
DIY Succulent Wall Hanging

As a mom of three little boys, I find myself struggling to keep the bathroom clean. Some days I just want to shut the door and not think about it. And this week, that is exactly what I did! I shut the door and worked on something that I wanted to work on. I had seen beautiful succulent projects on Pinterest and wanted to make my own succulent wall hanging.
Here's how I made my DIY succulent wall hanging!
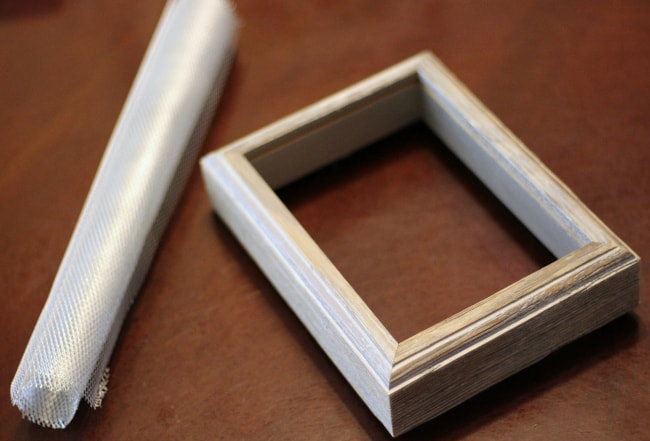
I made a quick trip to the craft store and picked up some easy to use wire mesh. I had been looking for something more durable, but it turns out this was perfect and I will tell you why in a minute! I also picked up a shadow box at the craft store. I picked out 5 plants at Walmart because my frame was fairly small.
When I got home, I had to grab a hammer and well, bust out the glass pane from the shadow box. It was a bit sad, but slightly fun at the same time. (Just break it into the trash bag to save cleanup.)
DIY Succulent Wall Hanging
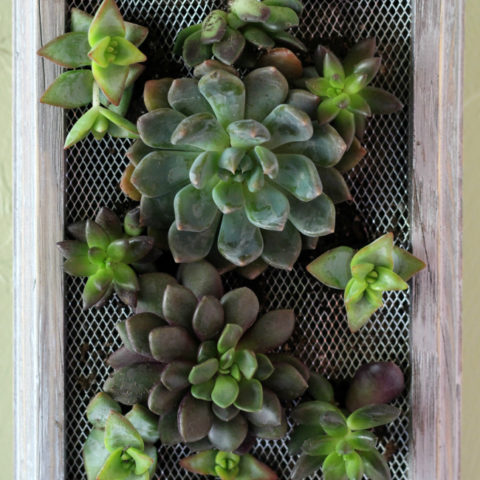
This DIY Succulent Wall Hanging is gorgeous and fun to make!
Materials
- shadow box, with glass pane taken out
- wire mesh
- piece of foam
- potting soil
- succulents
Tools
- scissors
- hot glue gun
- screwdriver
Instructions
- Using a screwdriver, remove any hardware for hanging the shadow box and set it aside. (you will need it shortly)
- Cut a piece of foam the size of your shadow box.
- Hot glue the foam to the back of your shadow box, sealing the outside. This will not prevent leaking, but if you are sure to get a good seal with the hot glue, it should help. (Alternatively, you can have a piece of thick plastic or acrylic cut at your hardware store. OR you can line the shadow box with a trash bag or something similar.)
- When the backing is on, grab your hardware and secure it on the back using the holes that held it in place before.
- Turn the shadow box over and fill it with potting soil, to just under the frame.
- Cut the wire mesh the size of the box where the glass pane once sat. You can trim it up later if you need to, so it's better to cut it a bit bigger.
- Next, cut holes in the wire mesh where you would like the succulents to sit. You can always cut the holes bigger later, but note how big the root balls of the succulents are because you will be placing them in these holes.
- Gently place the wire mesh into the shadow box, using hot glue to secure the corners.
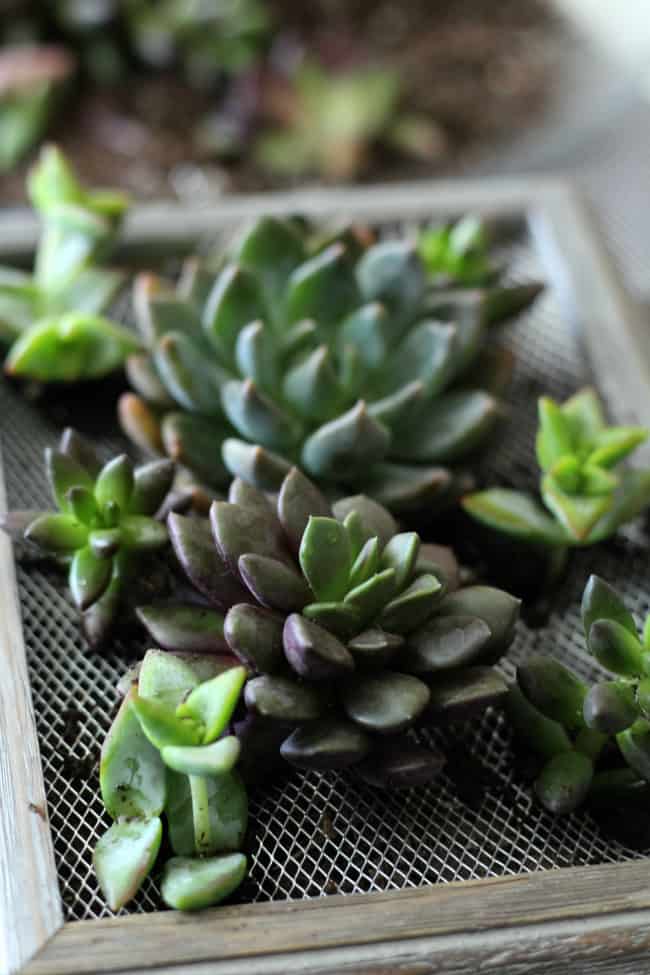
- Gently make a hole in the dirt where the holes in the wire mesh are, one at a time.
- Plant one succulent in each hole and add more potting soil if needed, and fashion some wire mesh strips under the plant if you accidentally cut your hole too big.
- Place shadow box on a cookie pan and water thoroughly, but do not overwater. Take note of any leakage and try to fill in the holes, if possible.
Notes
You will want your shadow box to sit for at least a week, to let the roots form in the soil. Hang on the wall, taking down when the soil feels dry (about every week), lightly soaking the soil, letting set for a few hours, and then hang back up.
What would you add to this succulent wall hanging? Check out my DIY Succulent Planters, too!