
DIY Splash Pad for Summer Fun, Year After Year!
DIY Splash Pad for Summer Fun, Year After Year!

When the weather begins to become even slightly warm each year, the boys start talking about summer and asking to play in the water. Thank goodness we live in Texas, because the Captain and D LOVE playing in the water in the backyard! A couple of years ago, Hubby built a DIY Splash Pad for them to play in and it has been a huge hit. The boys started asking to set it up a few weeks ago, and since it stores well and is a snap to set up, we bring it out year after year.
Below is a step-by-step guide to purchasing and setting up your splash pad just like the one in the picture - courtsey of my awesome hubby!
supplies for a 25' x 8' DIY sprinkler/splash pad:
- 140 feet of three-quarter inch PVC pipe (they come in 20' sections)
- ten 90° PVC connections
- ten T connections
- two ball valves
- one female water hose adapter
- two PVC ¾" caps (All the pieces must match the ¾" PVC pipe fitting.)
- hand powered PVC cutter
- PVC cement
- a long hose
directions:
1. Using the PVC pipe cutter, cut your pieces into these measurements: four 2' pieces, eight 5' pieces, ten 5' pieces, five 8' pieces,
2. Gather your base materials. You will use the 2' and 5' pieces as well as two caps, two ball valves, the female water hose adapter, and all 10 T connections, to assemble your base.
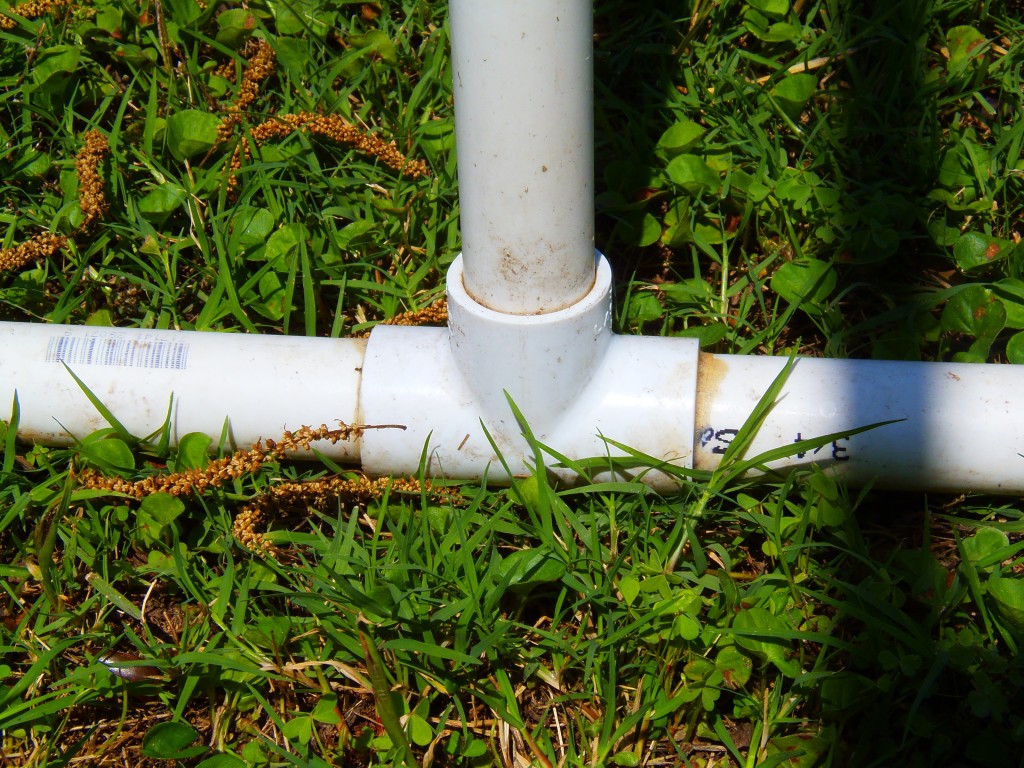
3. Lay all of your base materials out in two 25' assembly lines. Start by laying out your PVC pipes in this order. One 2', four 5', one 2'. Then, in between your pipes, place a T connection. Do the exact same thing with your other 2', 5' pipes, and T connections. you will have two identicaly assembly lines (unglued). See the picture to help see what it will look like once assembled. To finalize your base, you will need to lay your caps, ball valves, and hose adapter just outside each of the 4 ends of your assembly line. Each assebly line will have a cap glued on one end, and a ball valve glued on the other end. Pick which ever ball valve you want your hose adapter on the end of. I chose to put the hose adapter at the end of my splash pad that is closest to my water spicket.
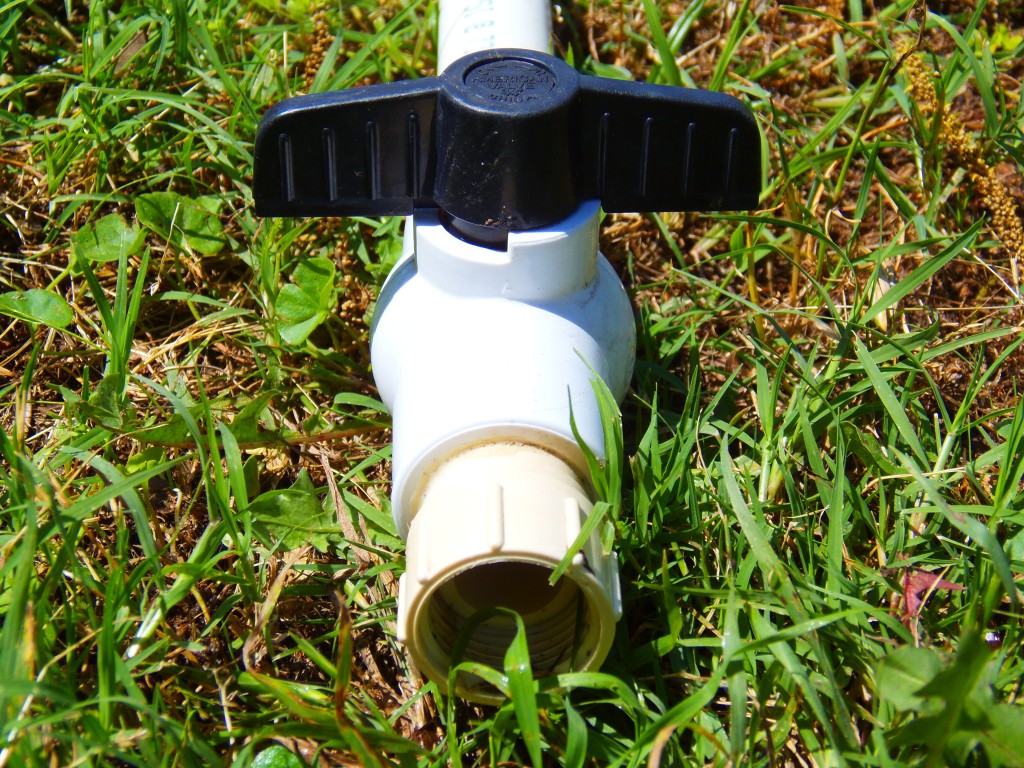
3. Now it's time to asseble the base. Please note, the PVC cement dries very quickly so you will want to apply it and connect it quickly to avoid errors, thus saving you money. The cement takes less than one minute to dry and become un-changable. Apply the cement liberally when connecting PVC and other plastic pieces. Starting with the 2' PVC pipe end of the assembly line, apply cement liberally with the applicator, where this piece connects with a T connection. Make sure and cover the connected surface area of both pieces you are gluing before you connect them. Once connected, you can lay them down and move to the next piece of PVC pipe (5'). The T connection you just glued will have an open end where you'll place the 5' piece. Using the same gluing method, connect them. All T connections need to be pointing up in the same direction. Follow this same pattern for both assembly lines, gluing each piece together, until you have two identical 25' foot pieces, with 5 T connections connecting each one. It's important that these two 25' pieces are identical at this point. Using the same gluing method, you will glue your caps, and ball valves to the ends you placed them on. You'll want to make sure that your ball valves are pointed up, in the same directions each of your T connections are. Then, glue your hose adapter to the end of one of your ball valves. The other ball valve, connected to the other 25' piece is there to drain your pipes, which will help keep mildew from buildling up.
4. Now you will drill your holes (water spouts) into your 5' and 8' PVC pieces. All of your holes will need to be on the same side of your PVC pipe (in linear fashion) and only need to enter through one wall of your pipe. Using a saw horse, or work table, and your 1/16 in. drill bit, drill 2 holes equidistant from each other into each of your 5' pieces. Using the same method, take 4 of your 8' pieces and drill 5 holes equidistant from each other in linear fashion. For the fifth 8' piece, you'll drill 15 holes in linear fashion equidistant from each other. There is some flexibility on your hole placement, if you would like a different spray pattern than what you see in the pictures.
5. Assembling the gates. Once all of your holes are drilled, you'll need to assemble your U-shaped, PVC "gates." Notice in the picture there are 5 "gates" and they are connected ot the base at each T connection. To assemble each gate, lay out two 5' pieces at the ends of one of your 8' pieces, thus making a U-shape. You will use your 90 degree connections to connnect your 5' pieces to your 8' piece. It's important that you line up your pipe's holes in linear fashion so that the water that sprays out of them is all directed inwardly. Except, your 8' piece with the 15 holes will be an unique "gate" where the holes on that piece will face up at a diagonal (creating an entrance or exit soaking). Once you get your pipes and connections ready, glue them using the same PVC cement and gluing method you used for the other pipes. Make sure your gate measurements are identical when assembling. Please use the picture if you have any questions about assembling gates. Give all of your pipes and connections 2 hours to dry in low-moisture conditions.
IMPORTANT NOTE***Your gates will NOT be glued to your base. They will remain push-to-fit so they can be detachable for easier storage.
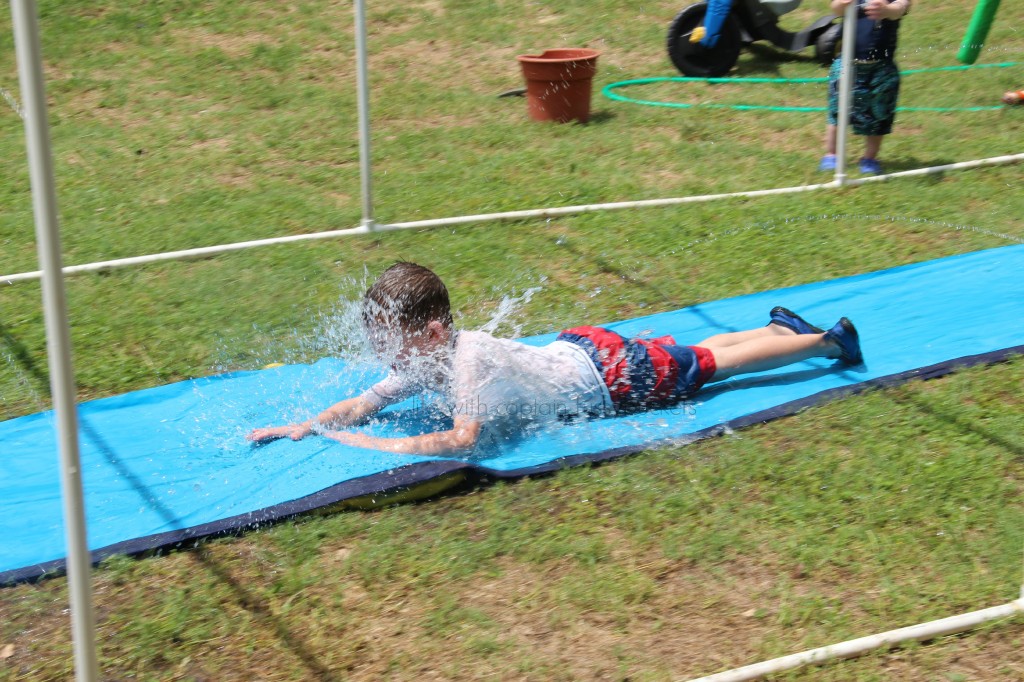
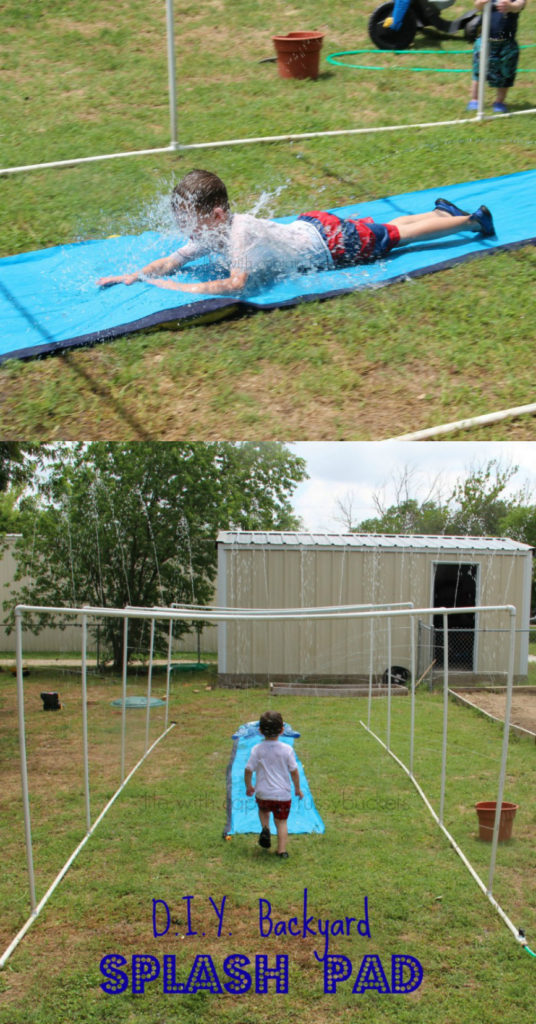
6. Final assembly. After 2 hours of drying, you will push-to-fit your final assembly. Push-to-fit assembly means that you will not need to use any more cement. You will just need to line up your two bases, on a flat, grassy area with the T connections pointed up. Then you will take each gate one by one and push the uprights of the gates into the open holes of the T connections on each base, to fit tightly (see pictures below). It helps to have 2 people put the gates into the base, but it can be done alone. Then, close the ball valve opposite the hose adapter end, and open the one that's attached to the hose adapter. Then, screw in any kind of water hose to your water hose adapter. At this point, the only place water should be able to escape, is your 55 water spouts you drilled into the pipes. Turn on your water hose, and give it a few minutes to build up pressure before expecting optimal performance. After 5 minutes, you should see water shooting out of every one of the 55 holes, with a strong but not a fast flow, similar to a shower head. In our splash pad, we chose to place a 15 foot slip and slide underneath the "tunnel" of "gates." You could do all kinds of variations of "soaking" with this splash pad. For older kids, you may consider placing this portable splash pad at the top of a grassy hill, and placing some heavy plastic underneath it, extending down the hill for for 50' or 100'.
7. Storing the splash pad - it's very simple to detach and move the splash pad. By hand, firmly pull up each gate, separating it from the T connections on the base. This leaves you with 7 large pieces. You can store them in direct sunlight, or in a garage.You don't have to worry about wrapping or protecting your pipes. They can handle the elements for years.
The boys love it, but what really made it great as they got older was putting a slip and slide underneath it:
You can add different things to make a mega splash pad for a party. Here are a few more fun backyard water ideas:
Water Scope
And don't forget to brush up on your summer safety tips, too!


Thank you for the article, it is very useful for us.